How to Make Easy Tshirt Tube Top From at Shirt
Colleen is an avid couponer who enjoys sewing, cooking, sports, reading, and trying new items.
How to brand a T-shirt quilt: An like shooting fish in a barrel beginner project.
Colleen Fowler
Until I attempted to make this quilt, I had not sewn annihilation in well-nigh fifteen years. I had used my sewing machine all of one time that time fifteen years ago, and I remembered none of information technology. This how-to is for those of you lot who want to brand something awesome, only have no inkling how, like I was. This project was to keep me busy during my husband's deployment. He had many shirts that he had accumulated over his military career, plus others he but didn't want to function with for whatever reason. I was tired of having them clutter up our storage so we agreed that someday I would plough them into a Quilt. Someday finally arrived, and I was lost. Here is step-by-step my unconventional way of making this quilt.
Colleen Fowler
i. Sentinel YouTube Tutorials
Lookout YouTube videos on how to use your sewing machine. I tin't just tell you how to utilize it, because each is different. I read the manual that came with the car (Actually extremely helpful!) and then watched a few YouTube videos to learn about tension, stitch styles, and how fast to sew. This video (to the right) was a lifesaver when it came to learning about my machine. I had no idea my sewing machine would wind the thread around the bobbin for me; I was doing information technology by hand!
two. Cull Your Shirts and the Size of Your Squares
I decided that I wanted my quilt squares to be 12" by 12". My married man's shirts were all medium and big sizes then this worked out. Base the size of the squares on the size of the shirts. I chose a measurement that would allow near of the images to fit inside that square. You also don't even have to choose a foursquare; rectangles will work just likewise. I and so figured out how big I wanted my quilt (large enough to cover my husband on the couch) and did some math to see how many shirts I needed to make full the quilt. I allowed for 1" borders around each square.
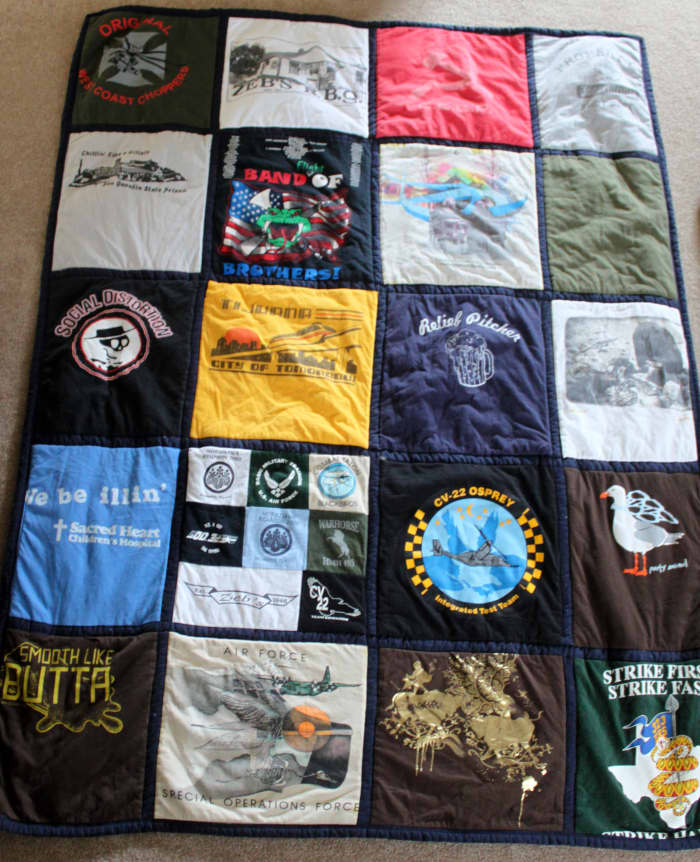
The finished product
Colleen Fowler
3. Pick Your Border Textile, Filling, and Backing
I chose a bones nighttime bluish cotton for the material that was to border the individual shirts. Be certain to pre-wash this cloth before y'all stitch information technology on, as information technology volition compress a little bit and you don't desire it to scrunch up your quilt the first time you have to launder it. I pre-washed it then ironed it then it was flat and easier to work with. For the filler I cheated a little bit. I knew my married man liked heavy quilts, and upon research I found the best way to get a heavy quilt was to cut upwards an old quilt and use the filling from it. I happened to have an erstwhile one that was falling apart and cut out the filling. However, most craft and sewing stores sell the filling (called batting) in unlike weights and sizes that you tin can buy. For the back I chose a soft plaid fleece. The back can be any fabric you lot want, even a basic cotton fiber would work well. My husband is but partial to soft blankets.
4. Mensurate, Measure, Measure
Now that you have all of your fabric, you can begin to measure and marker. I cannot stress that you should measure out, then check your measurements twice more before cutting them. I made a template of a 12x12 square that I could trace onto the back of each of the shirts. Sewing stores similar Joanne's sell markers with ink that washes out. Use ane of these, and mark your shirts. DO Not Cut YET! Then comes the catchy part. For the 1" border that goes around the shirts, you will be cutting long strips of cloth, and short strips of textile. For my quilt, I would take five rows, with iv shirts in each row. For my quilt, I cut half-dozen long pieces – one for the top of the quilt, one to go in-betwixt each row of shirts, and one for the bottom. This ran the length of the entire quilt, add upwardly the length of each square plus add one inch in between each shirt. Then, y'all will want curt strips to run between each shirt. I needed 15 strips that were 2" longer than each shirt, and then fourteen" long, and then half dozen strips that were 53" long.
To get a nice 1" edge that was straight, hither is my cheater way: I bought 1" masking tape. I so laid out my textile and ran the masking tape straight on the fabric, in the length needed (6 strips at 53"; 15 strips at 14") using the assistance of a yardstick. I then cutting effectually the masking tape leaving a liberal amount of fabric on each side so that it tin be sewn onto the shirts. Leave the tape on, it will easily permit you lot to get a directly stitch and a correct width when y'all are putting it all together.
I and so cut my shirts. DO Not cut on the lines you have drawn! Leave a couple of inches around the line when you lot cut, to allow for the pieces to be sewn together. The line marks what yous want showing on the front of the quilt.
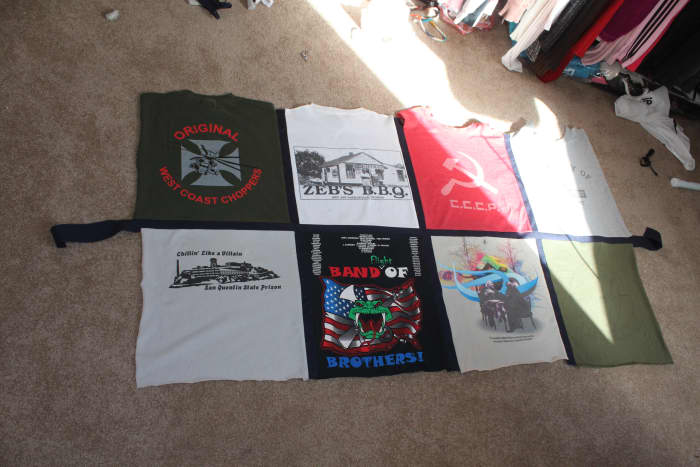
5. Pin It Together!
I separated my shirts into five piles, ane pile for each row. I then ordered the shirts so that they could hands be sewn in the correct lodge from left to correct. I then pinned the shirt to the first of the short strips, lining up the edge of the masking tape with the line I had drawn on the shirt. When I made the quilt, I chose to pivot a shirt to a short strip, sew it on, and so pin the next shirt to the other side of that strip (one strip will attach 2 shirts together). Doing it over once again I would pin an entire row together and sew it all at one time. You can choose whatever is easiest for you. Simply make sure that you are lining up all of the shirts, so that the pinnacle and bottom lines of the foursquare you have drawn are all in a straight line – this is very important.
6. Stitch
Use the masking tape as your guide. I have a hard fourth dimension sewing a directly line. I found it was really easy to position the needle right next to the masking tape, and just proceed the sew going along the tape. Once both sides of a strip were sewn, I could remove the record. I had straight lines AND a perfect one inch edge between shirts.
Ii rows, sewn together
Colleen Fowler
7. Pin and Sew together Some More than
One time the brusk strips are all sewn to the shirts, yous are probably feeling pretty adept about yourself. This side by side step was the most fun for me considering I could really meet information technology meeting. I grabbed the long strips, and pinned ane to the pinnacle of the very meridian row of shirts lining up the masking tape with the line drawn on the shirts. I sewed it on. I then pinned another long strip to the bottom of that row, and sewed information technology on. So pin the adjacent row to the bottom of that same strip, run up and echo. It looks like a quilt now!
Coil to Keep
Read More From Feltmagnet
8. Wash, Trim, and Fe
Now that all the pieces are sewn together, wash them to remove the lines you accept fatigued. Once they are out of the dryer, trim the excess fabric from the shirts and the strips (not the strips effectually the outer edges!) and iron the seams flat. This will make your quilt await better and be more than comfortable in the end.

Pinning, pinning, pinning
Colleen Fowler
9. Put It Together
Now you need to become your batting (filling) and the backing for your quilt. Discover a large place in your house where y'all can lay it out if you lot are like me and don't have a huge quilting tabular array. I chose my kitchen floor because I could use tape to help concur things in place. Lay out your backing (mine was fleece). Then place your batting on meridian of information technology, then your quilt top that you pieced together on acme of that. I read that using a light spray agglutinative helps to keep it all in place, but I did not take whatever and then I used masking tape on my kitchen floor.
10. Pin, Pin, Pin!
I pinned all around the outer edges, and so forth each of the strips (the ones running between the shirts) I used at least 10 pins per row between each shirt. I pinned in the center of the dark bluish strips, because I would be stitching along the edges of the strips subsequently. Once you lot are done, carefully untape if that is what y'all did, and whorl up the quilt to be carried back to your automobile.
How to Sew together Big Quilts on a Small-scale Machine
xi. Quilt!
I read nearly a dozen unlike means of quilting, the procedure by which you lot stitch the layers of the coating together. I chose an like shooting fish in a barrel way since I had no idea what I was doing. I decided that I would do something chosen "sew together in the ditch" where I basically sewed along every seam on the quilt. So, I sewed everywhere each shirt meets a blue strip. I did this in rows, then I essentially made 8 long horizontal lines of stitching, and then I made 6 very long vertical lines of sewing.
Information technology was easy to practice the sewing well-nigh the edges of the blanket. The eye nevertheless took some figuring out. My sewing machine is minor, my quilt is large. I discovered that if I pulled the coating through, and rolled it upward underneath the arm it really did all fit. It'south called the log method and it can exist Googled for more detailed instructions. For another method, check out this video to the correct, she uses the squish method.
Bounden a Quilt
12. Bind
I will non fifty-fifty endeavor to explain this function, as I did a pretty expert job of botching it myself. Binding is where you lot become that dainty finished border to your quilt. At that place are a few different ways, and the video to the correct ended up being my favorite way except I didn't get the corners right…merely they wait okay anyhow! It's your first project; don't expect it to be perfect.
Finished!
Now, your quilt is finished! Advisedly go through and trim the lose threads, double check for pins, mayhap run a lint-roller over information technology to remove small pieces of fabric and fuzz and wrap it up to be given to its new owner.
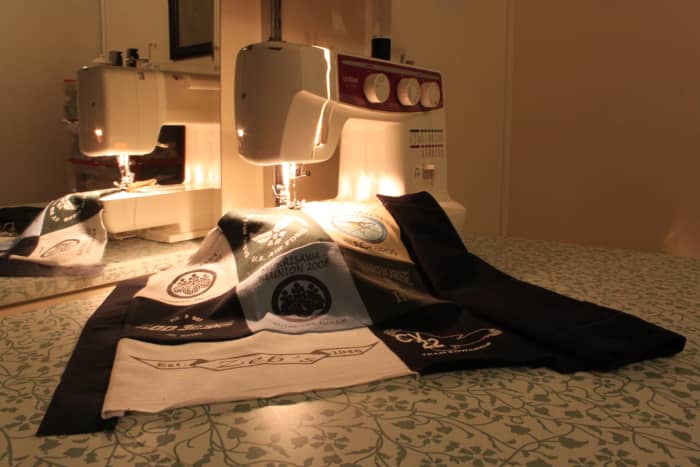
*Y'all volition notice that in the start photo information technology appears that I am sewing a bunch of small pieces together. I chose to make one square out of a bunch of the fiddling logos on the front of the shirts.
Abigail Hreha from Oregon on May 22, 2019:
This is such a beautiful quilt! I've been saving my husbands one-time T shirts and our shirts from fun vacations to do something like this. Exercise you treat the cloth with anything to keep it from stretching when yous quilt it?
Beverly on January 03, 2019:
I'm in the processing of downsizings. I don't wear T-shirts like I use to, only I have a lot of special t-shirts. There are so many things you can make with t-shirts, pillows, bags, recycling them into shopping bags, quilts, etc. I normally wear T-shirts on Saturday. I have a free pass to my YMCA through my insurance visitor and I can where them when I work out. I usually wear tank tops under flannel shirts in the winter. A quilt's i slice opposed to many pillows and bags. I would apply t-shirts with no sentimental value as produce bags. You have to be careful with recycling cloth bags considering they tin carry harmful bacteria.
An on October xvi, 2018:
Yous actually demand stabilizer on the T-shirt backs. They volition stretch and pull with out it.
Tracey on May ten, 2018:
Yous didn't accilent job of explaining! I admittedly love the thought with the masking tape. It turned out great!
Queenmarcia on December 10, 2017:
Excellent instruction. I would add i thing. I used a stabilizer ironed to the back of each tshirt. It. Near 99 cents a yard, about 18 inches wide. The stabilizer keeps the tshirt fabric very flat and makes sewing easier (eliminates the stretch). Just a step you might consider adding.
deb osowski on August 17, 2017:
Very dainty and informative tutorial. i accept a bag of shirts in my sewing room waiting patiently for someone to transform them to a quilt. this is at present my weekend project.
Helen Nixon on Apr 08, 2017:
Thanks! A t- shirt quilt has been on my radar just I had a bunch of baby quilts to make get-go. This makes it expect simple. I want to effort and use 2 sided shirts and match the back and front with my old cat shirt collection. I did that with old hankies and the trick there was that the designs varied by hankie size but with cutting the t-shirts I should exist able to brand that lucifer much easier. The binding video was helpful. Promise your married man liked yours. You lot did a great job!
Mary Jane Craig on April 08, 2017:
Thanks, I accept a lot of old car outcome t-shirts I have saved for such a project but accept been very apprehensive about starting. You did a good job of explaining, now I can motion on with it!
Vickie Sizemore on January 18, 2017:
Want to take my grandsons t-shirts and make a graduation present for him, exist my offset full quilt, and I believe you have helped me go started, tfs
Carmene on November 06, 2016:
How long did information technology have you to get this quilt
Ashley on October 17, 2016:
I Lost My One And But Grandparent That Has Been Around Me My Whole Life! My Grandmother Practically Raised Me And Terminal Year A Calendar week Earlier Christmas ( Hers And I Favorite Vacation ) She Passed Abroad At 68 years Old Christmas is never the same to me I miss her more than than i ever did you never realize how much you love someone til that person is gone well i accept grabbed all her T-Shirts that she had and I'm Going to do my best on trying to plow her shirts into a quilt I've been watching all kinds of videos fifty-fifty reading stride by steps on how to practice it there is so many dissimilar ways! I Hope Information technology Turns out okay considering its my first sewing project i take done in years! i only sewed a pillow with a sewing car so this is going to be a little of a claiming for me thanks for the steps by steps and wish me luck because i need it
krystal on September 23, 2016:
Dandy tutorial for those of still learning. Cheers for sharing!
Debbie McLaughlin on August 09, 2016:
Thanks for your instructions on the t-shirt quilt. I'm making one now for my husband - a Marine Corps/Military quilt. He has and so many military t-shirts, I had plenty to choose from. It is time consuming of course, and mine is not going to be perfect (I can already tell), but it does await skillful and so far!
Susan on July 02, 2016:
I desire to do this for a graduation gift to my son with us 4 years of njrotc tshirts
Joanie on May 22, 2016:
Nice job. I'm about to brand a T-Shirt quilt for the start time. Y'all provided very practiced info. Thanks
Linda on February 12, 2016:
I take made numerous art quilts, merely never a t-shirt quilt. Honey your instructions, actually helped. I have 2 granddaughters who recently lost their Daddy and they are very excited nearly their t-shirt memory quilts. Thank y'all!
Ballad on Jan 11, 2016:
Yous really should have backed each t-shirt with shape flex. Information technology makes the shirt not stretch. Makes for a nicer finished quilt. I have made many. At that place won't exist whatsoever puckering in the quilt.
cjohnstoon on December 27, 2015:
if yous are a new quilter, effort to detect a quilt quild or church building quilting group to get hands on instruction--they are e'er set up to aid new quilters.
E.Taylor on November 23, 2015:
I accept made several quilts, but never a T-shirt quilt. This was a not bad
presentation and I will outset saving T-shirts to make my first one. May
have to enquire friends to save theirs for me. Yours was beautiful.
Quiltlover on Nov xx, 2015:
When making a t-shirt quilt iron featherweight interfacing on the back of the t-shirt - it won't stretch or go whacked out of shape. I brand all my t-shirt quilts with fleece on the back. Swell graduation souvenir.
moonlake from America on Oct xx, 2015:
Beautiful quilt. My friend has made a couple they are and so nice. I happen to discover your hub because it was on my granddaughter's pinterest. Great hub.
JoanK on October 12, 2015:
Thank you
SFC/FRANK ROMERO JR on July 14, 2015:
Crawly, I want to learnhow to do information technology, thanks.
Kristen Howe from Northeast Ohio on April x, 2015:
What a beautiful and clever idea. I love information technology! It looks piece of cake and fun to practice! Voted up for beautiful!
Loraine Brummer from Hartington, Nebraska on October eleven, 2014:
A neat use for loved, only no longer worn, t-shirts. Informative article for anyone wanting to brand a quilt from them.
CherylsArt on October x, 2014:
You did a great job! I like soft blankets likewise, and the tshirts are a keen idea!
Obituary on July 10, 2014:
Looks unproblematic but I know the amount work involved here's hoping I tin practice information technology!
Lea Kid from IOWA Metropolis on June 18, 2014:
I love these kinds of quilts! They are so fun and can really reflect personality more than just regular cloth. By the way, did you know that you can use fusible interfacing to make the t-shirts less stretchy and easier to work with? I've used it and it makes working with t-shirts then much easier! I love the binding tutorial video, too. Information technology'southward the exact same i I used when I was learning how to bind a quilt.
jemma on March 26, 2014:
im about to embark on one of these for my son,
im a total novice when it comes to quilting and sewing. you did a slap-up job!
Kim on Nov 16, 2013:
Great
Chitrangada Sharan from New Delhi, Bharat on May xviii, 2013:
This looks very interesting! Never thought onetime T -shirts could be used to make a quilt.
Cheers for sharing the details!
Practical Paws on May 17, 2013:
Great idea for using quondam T-shirts. You lot've encouraged me to 'step outside' the quilting box of only using 100% cotton fabric that doesn't stretch. Using fleece for the backing was inspired on your role!
parrishsullumeent.blogspot.com
Source: https://feltmagnet.com/textiles-sewing/How-to-Make-a-T-Shirt-Quilt-for-Beginners-a-Step-by-Step-Guide
0 Response to "How to Make Easy Tshirt Tube Top From at Shirt"
Post a Comment